


I love having little baskets and containers around to keep things tidy, and have really been wanting to experiment with different materials to crochet with recently. This little basket is not only a perfect way to practice crocheting with rope, but also to hold little odds and ends! For this project I used a Size P crochet hook and one package of clothesline rope. This rope is nylon, but it would be fun to use cotton rope and experiment with dyeing it different colors! How cute would it be to dye the rope a few different colors and make a giant granny square rug?
Now, lets get to the project pictured above...
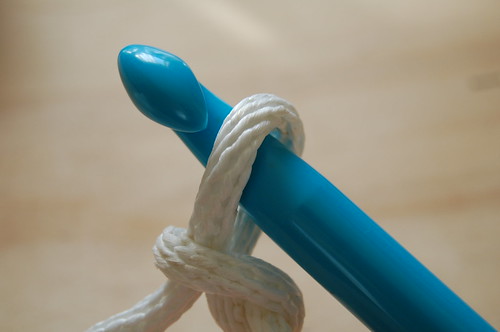
To begin, start with a slipknot and then chain five stitches.
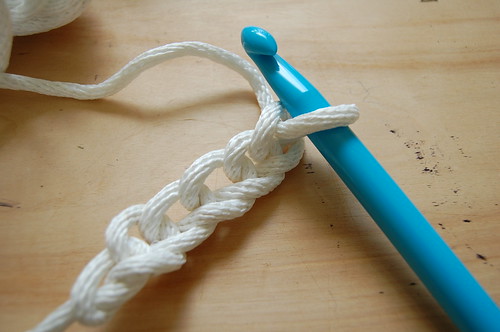
In order to close up your loop, send your hook through the center of the original slipknot and chain one.
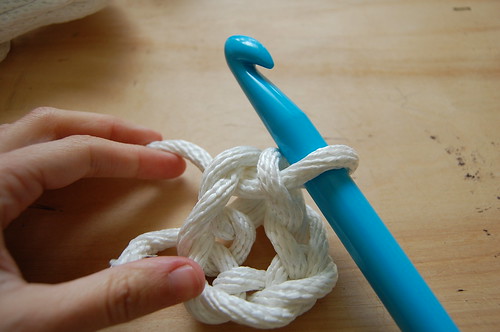
Your loop should look like the one above.

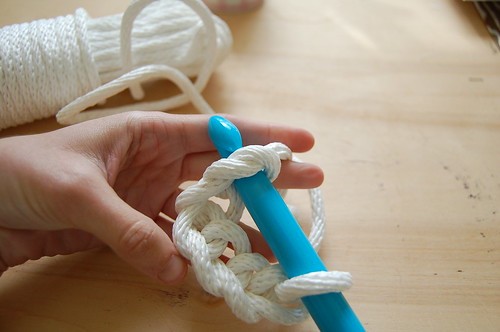
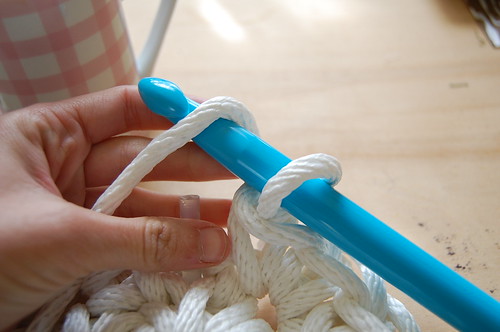
Send your hook through the center of the loop and single crochet six stitches. This should bring you back where you started--please feel free to improvise by adding or subtracting stitches, if necessary.
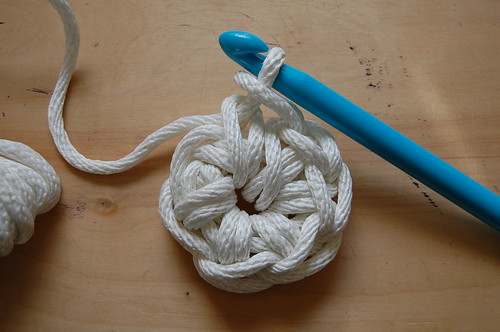
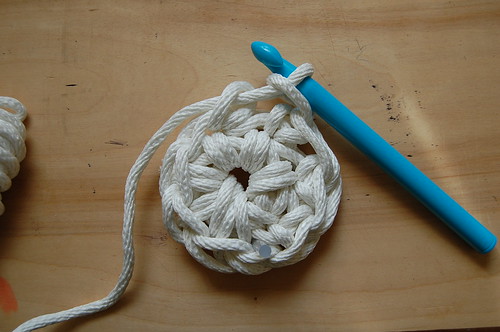
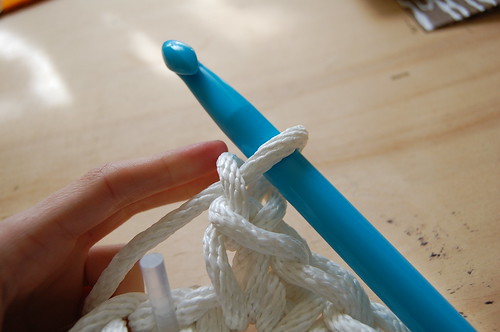
One completed round should look something like this.
Chain one, and go around the circle again.
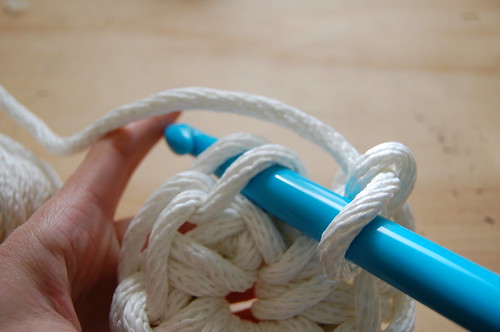
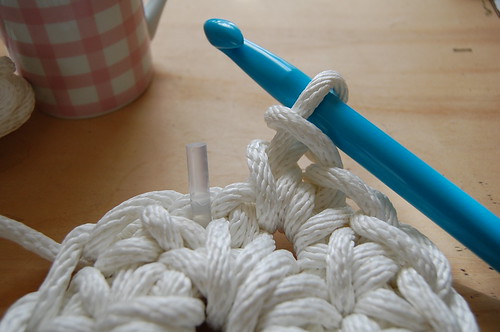
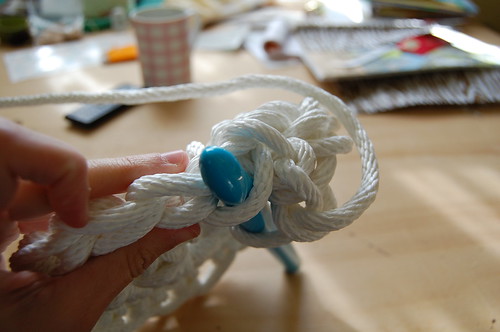
Stitch markers definitely make it easier to keep track of where your rounds begin and end. I did not have any handy, so I used a glue stick. :)
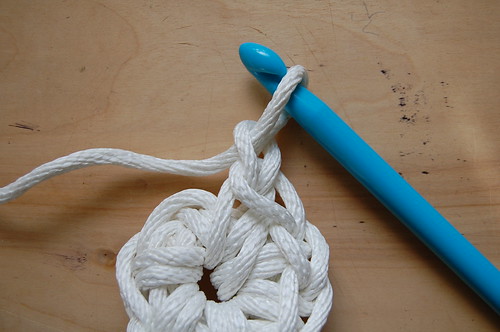
Round and round we go...
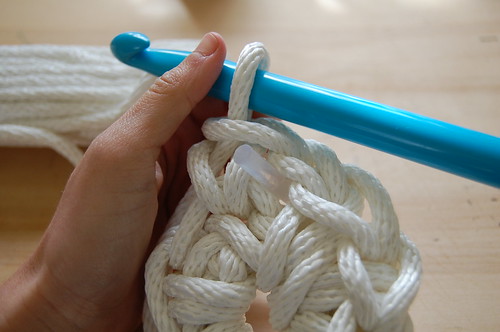
When your base is as wide as you want it (mine was four rounds), it is time to begin building up the walls. Start with a chain stitch...
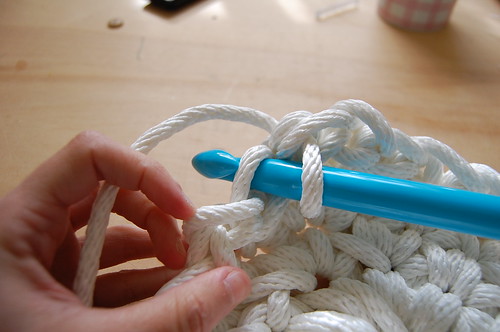
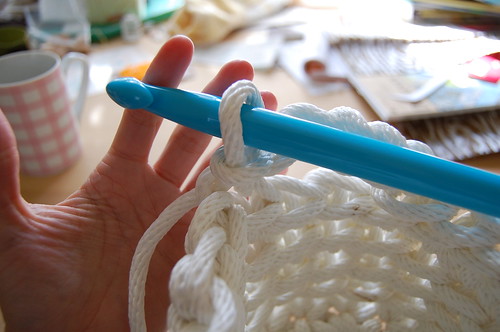
Then begin your next round of single crochet through the top of each stitch below (by sending your hook through the middle of the stitch, as opposed to underneath it).

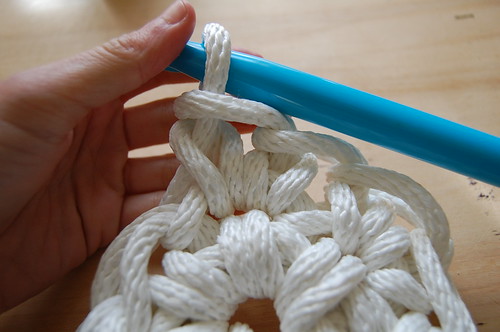
Pull these stitches tight, in order to form a stable base for your basket.
Once the base round is finished, chain one and start on round two of your walls. For round two and each round after, crochet through the bottom of each stitch.

Keep going...

and going...
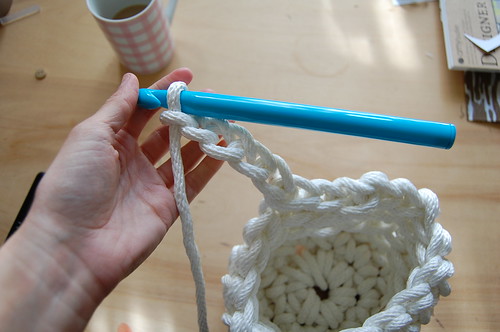
When you are ready to begin your last row, chain five stitches. This will become your handle.
Skip two stitches and attach the chain to the basket rim with another chain stitch. Continue to chain stitch to the rim until you are halfway around the basket. Follow the instructions above to make another handle, then continue your stitches until you reach the beginning of your round.
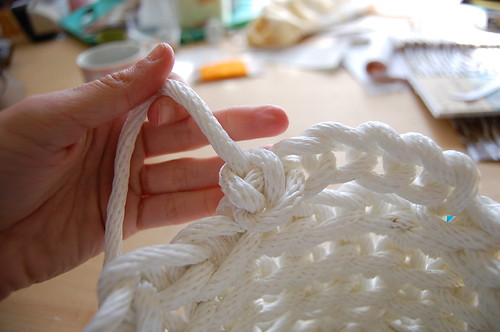
When you have reached the end of your last round, pull the end of the rope through the last stitch, then weave it into the basket and tie it off.
All done!
If you do this project, please email me a photo--I would love to see it!


23 comments:
This is sooo awesome!!! I love it! I"ll definitely have to try this!!! Brilliant, my dear!!!! xo
thanks so much, mama! xoxo
This is soooo cute! I may have to give it a try! I hope I wont suck at it :) Thanks for sharing!
oh this makes me consider learning to crochet just to make this. I love it.
Jessica--
Get yourself a big, cheap crochet hook and some chubby yarn and sit down with a YouTube video to learn how to crochet!
You will be so glad you did!
ooo! i like this one. i'm going to try it with some colored nylon rope! love the idea, thank you. :)
remember when you didn't know how to crochet?? now you are a machine!! This is so cool and I can not wait for more of your awesome tutorials :)
love you!
xo
janel
:) So cool! You are amazing lady!!! It's pretty and very useful! Thank you for the tutorial!
oooooooooooo! You have just inspired me in a whole new way. I love your tutorials! -k
I love this! I'm going to have to practice crocheting for a while and then give this a try! Thanks for sharing!
Eeeek! That's too cute, must make! Oh, and it would be perfect for presenting some handmade dish cloths for a newlywed couple I know! Thanks for the inspiration!
Amazing! Thanks for the tips, must try it, even though my crochet skills needs working on...this will be the task!
that is super awesome! what a great idea!
danielle thompson
Ooo, I love this! I am learning to crochet right now (been knitting already for a bit) and need (okay, want) a basket like this right now. I have a Q hook, didn't even realize that had a P.
Super nice! Thanks for sharing the idea!
Hello! Just came accross this tutorial and I love this basket! About how many yards of rope did it take?
I've crocheted a tree out of rope! (I'm an art student heh)
Great idea for a basket though. I have tons of rope left over and now I know what I'll do ;)
And yes, cotton is way better for anyone that wants to do this. Rougher fibers hurt the hands. Ask my callous :/
I love this idea!! Here's a link to the one I made. http://wp.me/p1GvGD-16
I struggled a bit with the turn from base to sides and I used a much thinner rope than yours but overall I'm happy with the results. If I were to do it again I would go with a cotton rope (like you did) instead of the shiny nylon. Thank you so much for sharing this!
What a cool project! I haven't crocheted in years but I'm very tempted to try making this.
Fantastic! This would be great in my room with nautical accents!
This looks like a project for me!
http://brittanysblogofrandomthings.blogspot.com/
Can't wait to try this !!!!!!
you are so talented!
Post a Comment